Import Nigeria eHealth Bauchi Health Facilities Workflow
In this wiki we will:
- present the import rules in OSM, then the data itself, the tool set to make the import, and the extra data that can be added as a useful complement.
- describe step-by-step a workflow to make the import, with screenshots and tips.
- then will focus on how to check and add extra data to the health facilities nodes, with your regular OSM account
- last but not least, show the final steps about how to upload the eHealth Africa data, including the required changeset tags, with your OSM import account, and the upload of the OSM layer with your regular OSM user account.
Load the data
Open JOSM and the Bing Imagery.
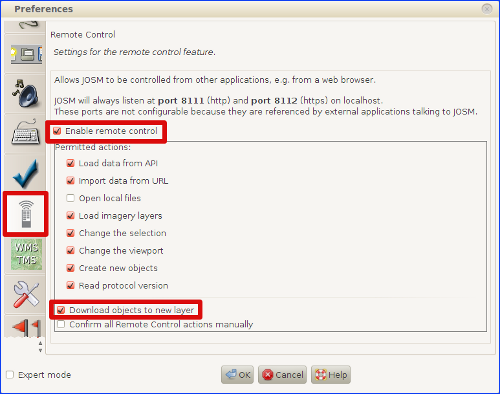
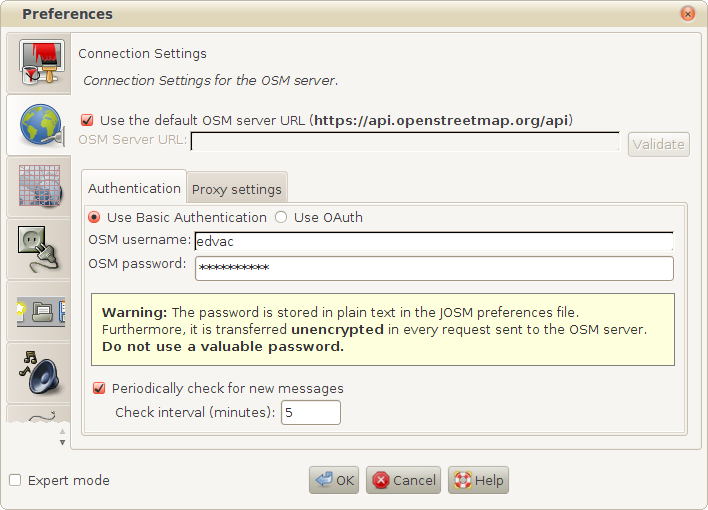
Before you do anything, check that you have the remote control enabled and the Download object to new layer box selected in the JOSM preferences:
Here is the link to the Tasking Manager job for the import:
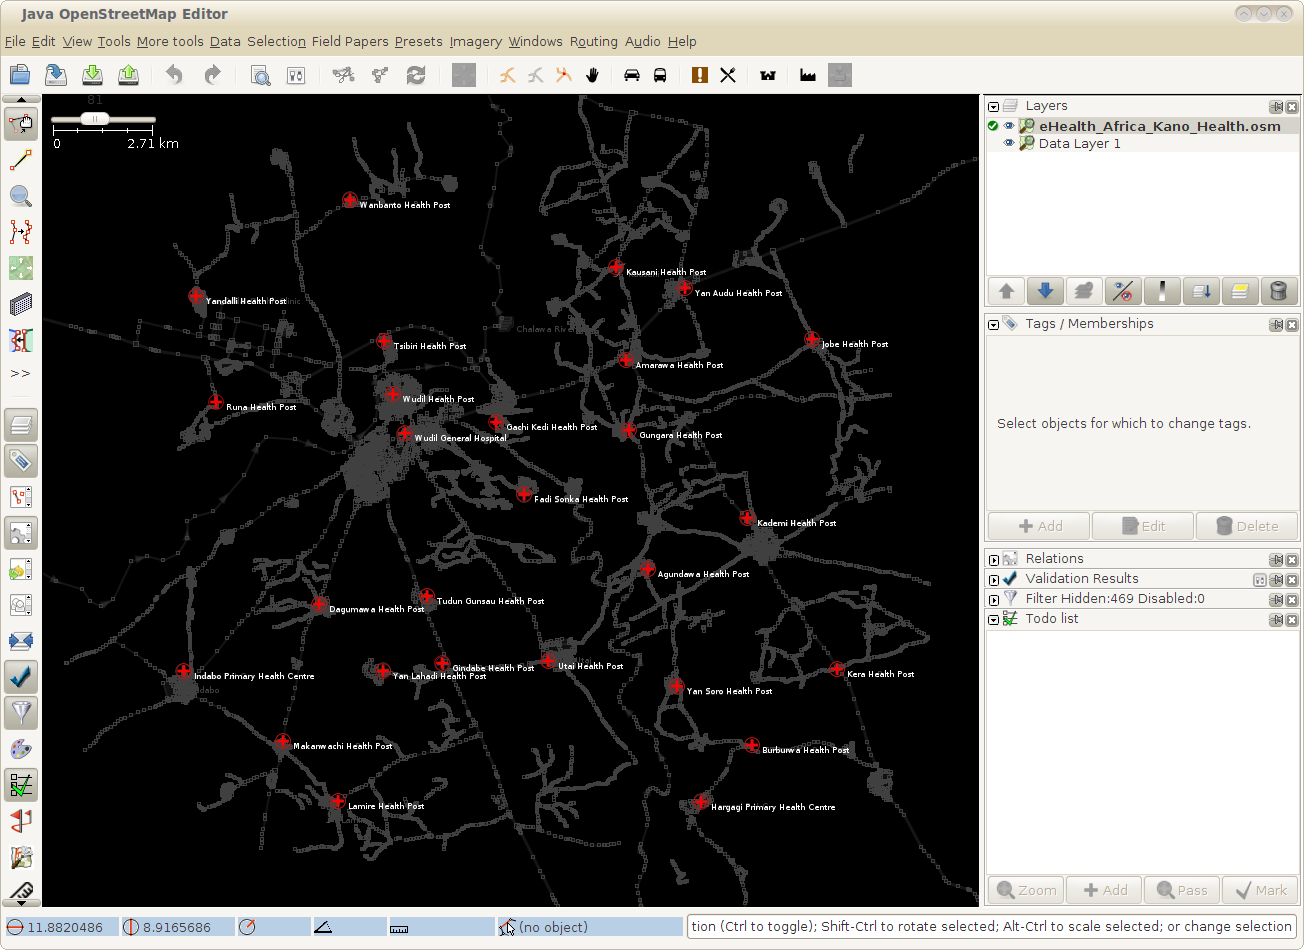
First choose your task, then click on Start mapping green button. You will find an "Edit with JOSM" button and Extra Instructions on the bottom of the new page. Click on the button "Edit with JOSM" and then click on the first “here” in the sentence “Import the eHealth Africa health facilities data for Bauchi State in JOSM by clicking here or download the data here.”. The OSM data will be loaded in a layer, and an eHealth_Africa_Bauchi_Health.osm file will be loaded in another layer. You should get a result as the example shown below:
Never merge these two layers in one, as we will upload the eHealth_Africa_Bauchi_Health.osm layer with the special import account, and the changes to the Data Layer 1 (OSM data) with our regular OSM account. Also, never split any task in the Tasking Manager, as that would lead to the task not to load the eHealth data into JOSM.
You are now ready to start checking the eHealth data for the task (tile) of your choice.
To organize your task, specially if the number of place nodes is high, we strongly recommend to use the Todo list JOSM plugin. Basically, you only have to select all nodes and then click on the Add button at the bottom of the Todo list window. Then, you will go through the nodes, one by one, and click on the Mark button when you finish a node. To check the first node of the list, just double click on it in the list. When you will mark that node as done, you will be automatically taken to the next one.
Checking the eHealth nodes and merging them with the OSM data
The location of the node is generally correct. In some cases, it needs to be moved a little bit to the actual position, normally not more than 50 meters away.
Sometimes you will see it over or near another health facility that is already in the OSM server. In that case, check what health facility is and merge it with the new one.
Although a thorough Q&A was performed with the data, we should check that the name of the Health Facility is spelled correctly and respect the cartographic writing conventions. With very few exceptions, each noun of the health facility must have its initial letter in capital and subsequent letters non-capital, like Gwagwarwa Primary Health Centre. In case of doubt, don't make any change to the name and write it on the comments of the task when you mark the task as done in the Tasking Manager.
Adding access roads to the OSM layer (Data Layer 1)
As we said before, it would be very interesting to take an extra time for each task to complete the road accesses to each of the health facilities being imported, and perhaps some extra contextual data, as the building or buildings of that health facility (tag the buildings as building=hospital).
For the classification of the roads, it's very important that you read the roads section in the Nigeria Wikiproject page ( http://wiki.openstreetmap.org/wiki/WikiProject_Nigeria#Roads ), that is mainly based in the Highway Tag Africa wiki ( http://wiki.openstreetmap.org/wiki/Highway_Tag_Africa ) with some small adaptations to the Nigerian particularities.
You can also improve the roads accuracy if it is bad.
Be careful to add all this roads and buildings to the Data Layer 1, not to the eHealth_Africa_Kano_Health.osm!
Upload the data to OSM
Uploading the eHealth data to OSM
First, we will upload the eHealth_Africa_Bauchi_Health.osm layer to OSM with the special imports account. For doing that we will follow these steps:
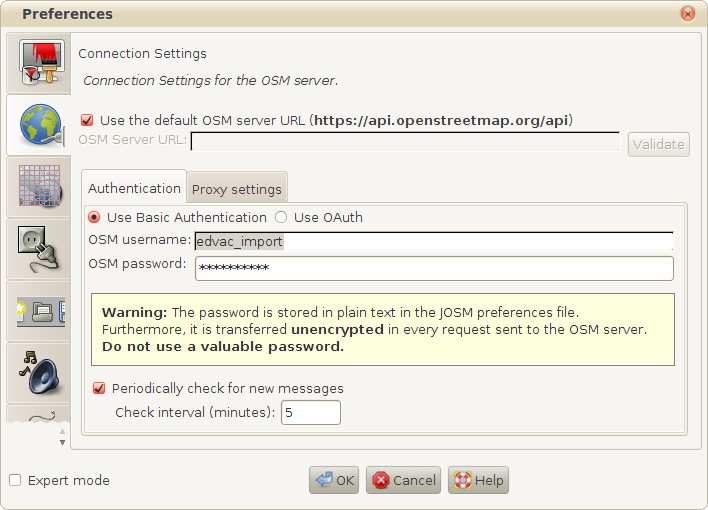
- Go to the JOSM -> Edit -> Preferences... and change the user and password to the special import user in the Connection Settings section.
- Make sure the eHealth_Africa_Bauchi_Health.osm is the active layer, checking that it has the Active Layer mark enabled to its left:
 .
.
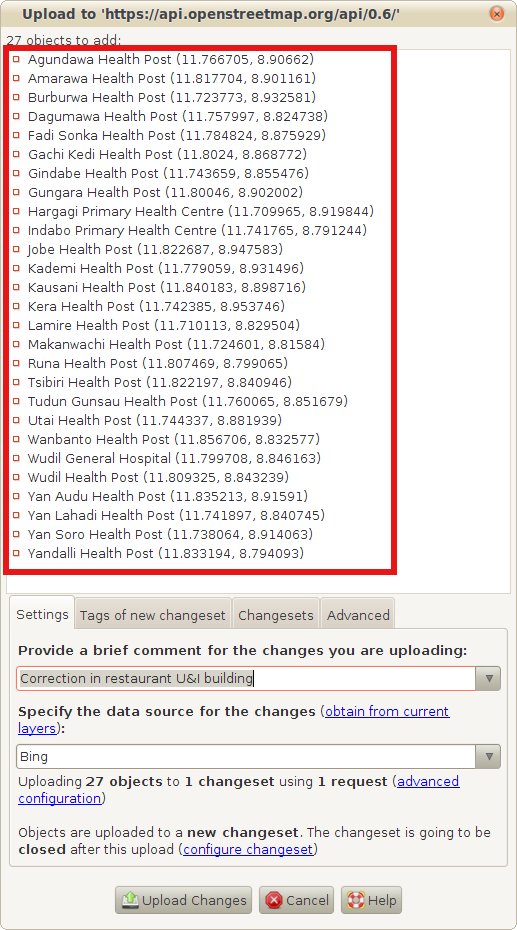
- Once you have done this, we can proceed with the upload. Press the JOSM upload button and, first of all, check that what you are uploading are only eHealth Health Facilities, and nothing else:
If by mistake you have added a building or a road to this layer, you will have to select them, cut them (CTRL+X) and paste them inside the Data Layer 1.
- Then, check if you have any error or warning that you might have to resolve and, before we click on the Upload Changes button, we will have to add the following changeset tags under the "Tags of new changeset" tab:
comment=eHealth Africa Bauchi Health Facilities Import, #hotosm-task-637
url=https://wiki.openstreetmap.org/wiki/Import_Nigeria_eHealth_Bauchi_Health_Facilities
Uploading the changes in the OSM data layer (Data Layer 1)
If you made any change in the Data Layer 1, like deleting old health facilities nodes or adding roads or buildings (most probably yes), you will have to upload this changes to the OSM database. But we will do this upload with our regular OSM account instead of the special imports account. Follow these steps:
- Go to the JOSM -> Edit -> Preferences... and change the user and password to your regular OSM user account in the Connection Settings section.
- Make sure the Data Layer 1 is the active layer, checking that it has the Active Layer mark enabled to its left:
 .
.
- Once you have done this, we can proceed with the upload. Press the JOSM upload button, resolve any error or warning that may arise from the validator and upload the changes with the comment and source tags as follows:
comment=eHealth Africa Bauchi Health Facilities Import, #hotosm-task-637
It is done now. Delete both Data Layer 1 and eHealth_Africa_Bauchi_Health.osm layers and Clear the Todo List (right click on it and hit the Clear the todo list button). Then, mark the task as done in the Tasking Manager, write any comments you consider useful (specially about any issuer you may have had encounter) and you are ready to take another task to import more data!
