JOSM/Plugins/AlignWayS
[!] The original author does no longer maintain this plugin. If you'd like to continue maintaining it, please get in touch.
Why using the AlignWayS plugin?
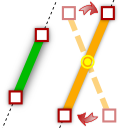
It may happen during editing that you'd like to have roads aligned with building outlines, or to make the lanes of a highway running parallel on the map.
These are situations when the AlignWayS plugin can be handy. All you do is: (1) select a reference way segment on the map, then (2) select a different segment to be aligned to it. Having selected them both, (3) hit the Align Way Segments action in the menu and that's it.
Availability
The plugin should be available in your JOSM Plugins preference window under "alignways" or you can download it from here.
Usage
In order to start using the plugin click on the Align Ways mode button ![]() on the left toolbar, or press ⇧ Shift+N (default, key may vary).
on the left toolbar, or press ⇧ Shift+N (default, key may vary).
You'll need to select a pair of segments you wish to align. One is called the reference segment, the other the to be aligned segment. It will probably make more sense to select the reference segment first, then the other one, but you can proceed in any order you wish.
You may also wish to decide which alignment mode to use.
- To select the reference segment, Ctrl+Click near a segment. The segment should turn green. This segment won't be changed.
- To select the to be aligned segment, Click near a different segment. The segment should turn orange.
- You will also notice yellow crosshairs on the two ends of the segment and in the centre of it. These are the potential rotation points or pivots that the segment can rotate around in order to become parallel with the reference segment. By default the centre pivot point is active and this is marked with the yellow dot-and-circle.
- (Optional) If you prefer a different pivot (or rotation point), clicking near a yellow crosshair on the segment.
- With the two segments selected (also see Restrictions) the AlignWays action button becomes active
 . Hit it to align the segments, or alternatively hit ⇧ Shift+A (default, key may vary).
 - (Optional) If you want to clear both selected segments Alt+Click in an open spot on the map.
Modes
Alignment can be done in two ways:
- Preserving length (default)
- Preserving angles
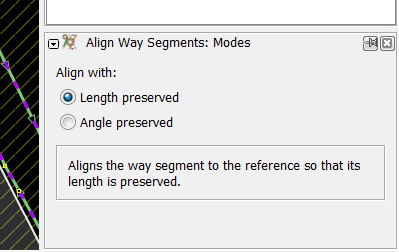
You can change the mode at any time during editing. You can do this in the Align Way Segments: Modes panel on the right:
If you don't see the panel, make sure its panel selector is activated in the left toolbar:
Preserving length
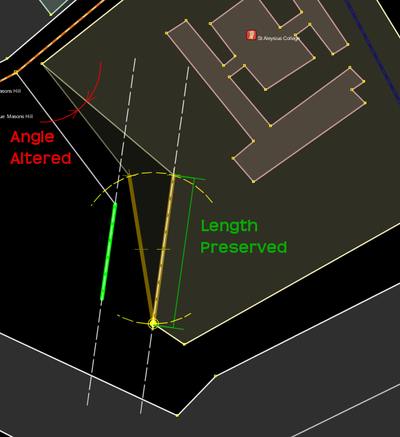
This is the classic aligning method: the aligned segment will preserve its length.
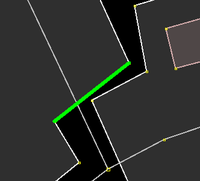
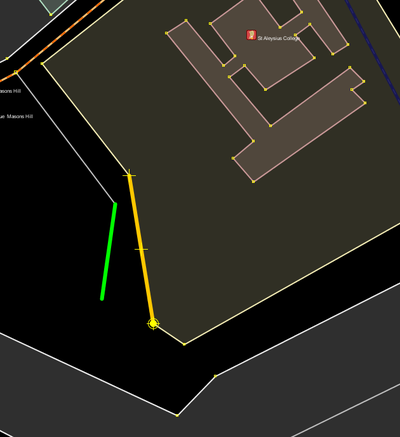
Consider the scenario where you want to align these segments (picture can be enlarged):
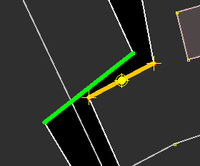
Alignment succeeds, the length is preserved, but the adjacent segment's angle is altered (picture can be enlarged):
Also see Restrictions.
Preserving angles
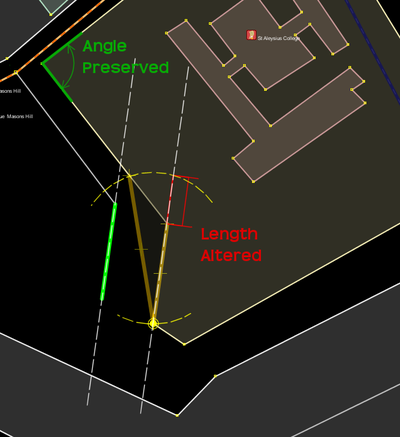
This is a newer aligning method where a successful operation will preserve all adjacent segments' angle.
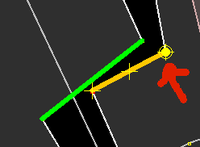
If you consider the same starting scenario as in the Preserving length case, the successful alignment will result in (picture can be enlarged):
As you see, this method does not guarantee that the length of the aligned segment will not change.
Also see Restrictions.
Restrictions
Regardless of aligning method
- You cannot select more than one segment to be aligned, i.e. the aligning works with a single pair of segments.
- In general the two selected segments should not share any nodes as this would result in changing the position of the reference segment. If the two selected segments connect, the only allowed way to align them is to place the pivot point on their shared node.
Angle preserving aligning method
- In general, the aligned segment must not connect to more than one segment at either ends. The only exception to this rule is when the endpoint is pivot.
- If the calculated angle of the aligned segment and (at least) one of its adjacent segments are perfectly parallel, alignment with this method is not possible.
Shortcut list
- ⇧ Shift+N (default, key may vary): Activate AlignWayS mode
- Ctrl+Click: Select the reference segment
- Click: Select the to be aligned segment and/or pivot points
- Alt+Click: Clear selections
- ⇧ Shift+A (default, key may vary): Align segments
Getting help
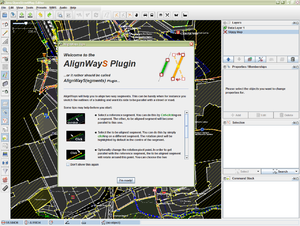
The plugin will show a tips dialog window the first time you access it from the left toolbar. If you no longer need it, tick the Don't show this again checkbox.
Tip: Once disactivated the tip dialog can be reactivated again by accessing Edit->Preferences->Setting preference entries directly, then search for the alignways.showtips key (you should find it somewhere at the top of the list :)) and set its value to true.
Development
Plugin was originally created by User:Tilusnet.
The author however does no longer maintain this plugin. If you'd like to continue maintaining it, please get in touch.
Change Log
- changes later on
- 28342:
- Added tr() calls aiding translation.
- 27387, 27398:
- Preventing the use of Windows->AlignWays Mode menu entry in the JOSM main window as it's meaningless without an active map frame.
- 27348 -- Major update! -- :
- Added 'angle preserving' aligning method (ticket #6926)
- Improvements and bugfixes
- 23165:
- AlignWays mode can be activated now with a shortcut (⇧ Shift+N by default)
- 23082:
- Fix for ticket #5430
- 22842:
- Adapted AlignWays to the recently changed editable layer removing mechanism in JOSM which caused AlignWays to fail cleanup on JOSM exit while in active AlignWays mode
- Tips dialog shows now a consistent action shortcut
- 22758:
- Connected segments can be aligned if the pivot is on their common node
- Fixed AlignWays command shortcut consistency in status bar
- Minor improvements in the Rotate Command class
- 21613: Initial version (on svn.openstreetmap.org)
- 20480: Initial version (originally on tilusnet.com)
