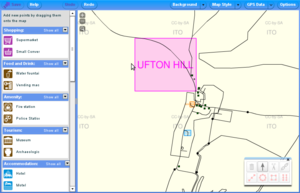
OSM and OSL differences tileset
When Ito World first started delivering tools for OpenStreetMap (OSM), there were very few options on the market. Since that time, many new tools and companies have focused on serving the OSM community. As a result, Ito World has decided to withdraw its OpenStreetMap Tools.
We’d like to take this opportunity to thank everyone who has used these tools over the past 8 years and would like to encourage everyone to keep contributing to OSM.
Alternative services you may wish to look at include https://www.geofabrik.de and https://www.mapbox.com. For more information about OSM data, please visit https://learnosm.org/en/ or https://wiki.openstreetmap.org/.

The OSM and OSL differences tileset is a tileset available for use as a background layer while editing in the UK. It highlights differences between the OS Locator data set of UK street names, and the street naming we have in the OpenStreetMap database.
This was created and maintained by ITO World based on the OS Locator boundaries of roads. Any ways not found in OSM were marked on these tiles as a bounding box encompassing the missing road. These tiles could previously be used as a background layer in Potlatch and JOSM.
More information was available on an ITOworld blog post about it
The OSM and OSL differences analysis tool gave stats by borough based on the same differences analysis.
A comma seperated .csv file of the changes from release to June 2011 is available here.
Using in editors
Potlatch 2
In Potlatch 2 you could simply click "Background" and select "OS OpenData Locator" (available only in the UK)
Potlatch
In potlatch original, add the following custom layer:
- http://tiles.itoworld.com/os_locator/!/!/!.png
Or see it by launching Potlatch directly in Darlington
JOSM
(No longer available).
- Download some OSM data for within the UK
- You may be asked if you want to enable some new background imagery layers, choose yes, as this will include the OS Locator if you haven't already got it enabled.
- Imagery menu → OS OpenData Locator and the tiles will appear as a background.
Old method:
- Edit → Preferences → choose the green "WMS TMS" tab on the left
- Add a layer menu entry with the following
- Menu Name: OS Locator diffs (ITO) --or whatever you want
- Service URL: tms:http://tiles.itoworld.com/os_locator -- adding this may break right now, just paste it into the table if you get wms: instead...
- Zoom to an area of interest, and then go to the imagery menu and choose the layer you just set up
Merkaartor
Via the "TMS Editor" add a TMS with the following parameters
- Server Url: http://tiles.itoworld.com/os_locator/%1/%2/%3.png
- Tile Size: 256
- Minimum zoom: 0
- Maximum zoom: 17